OVERVIEW
The Touch Surface Air is a capacitive 6-button touch switch that is installed underneath worktops, perfect for local control of your smart home where you work.
For Touch Surface Tree click here
TECHNICAL SPECIFICATION
- Power Supply: 9 – 28VDC PELV/Power Adaptor/Battery Pack
- Maximum Surface Thickness: 30mm
- Power Consumption:
- Typically: 67mW
- Max: 133mW (using LEDs)
- Operating temperature: 0 – 55 ° C
- Maximum Humidity: 95% r. H
- Protection class: IP20
- Frequency: 868MHz (SRD band Europe), 915MHz (ISM Band Region 2)
- Dimensions: 304mm x 115mm x 18mm
- Feedback: Click on touch (optional)
![]()
The surface being used must be non-conductive in order for the Touch Surface to function.
GENERAL INFORMATION
There are two modes of using the Touch Surface Air and by default, the surface is in the first of these listed below. These modes can be changed via Loxone Config in the touch surface periphery under the property “Activation necessary”.
- Activation Required
- In this mode, the Touch Surface must be activated before it can be used. This is done simply by pressing button 6 once, after 500ms (if no other button is touched during this time) the touch activates for 5 seconds (default time). During this time all keys (also key 6) can be used independently. Whenever a key is pressed during this time, the activation time is reset to 5 seconds. If no button is pressed for 5 seconds, the touch is deactivated again and must be reactivated via button 6 to continue use. The activation and its expiration time are visualised by means of the 5 LEDs counting down. This mode should be used when the Touch Surface is placed under tables, surfaces or kitchen tops. The activation process is to protect against any unintentional button presses such as leaning on a button when preparing food or spilling liquids onto the surface.
- Buttons Always Active
- In this mode, all 6 touch points are always active and can be used at any time. On touch, a key-click is registered and forwarded to the Miniserver. Multi clicks are not supported.
![]()
![]()
![]()
![]()
ASSEMBLY
The Touch Surface is best attached to the surface in question by screwing it to the underside. It can also be glued to the surface. Power connection is required to get this device to operate, this can be done either by 24V Power Supply or Battery.
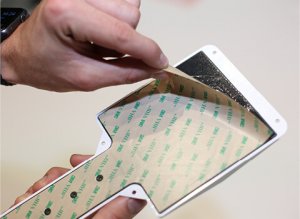
Adhesive: Using the supplied 3M adhesive strip, you can attach the touch surface on smooth oil-free surfaces directly without screws.
Screws: For a reliable and durable assembly, we recommend the touch to be attached to the bottom surface with screws. The touch surface has five mounting points.
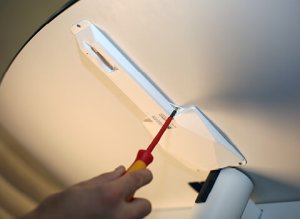
 Be sure to avoid any Air gap between the underside of the mounting surface and the Touch Surface.
DECAL
With the included touch point decal sticker you can attach the 5 keys as well as the activation key of a touch surface on any smooth surface. Please make sure that the surface is dry and free of grease.
To fix the decal for the Touch Surface to your surface follow these steps:
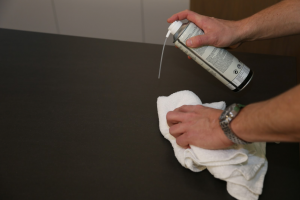
- Prepare the surface.
Please ensure that the surface is dry and warmer than 8 ° C.
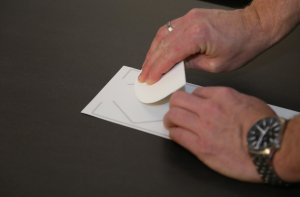
- Preparation of the decal
Prepare the decal by removing any air bubbles that might have formed via firmly rubbing the sheet with a smooth edge (squeegee/credit card).
- Align the decal
Ensure that you have aligned the decal up to the touch surface. It is crucial that this is near on perfect as this is the method in which you locate the touch switch.
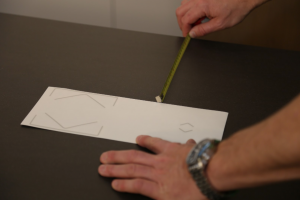
- Remove the backing paper.
Peel the backing paper away from the decal. If the decal appears to stick, repeat step 2.
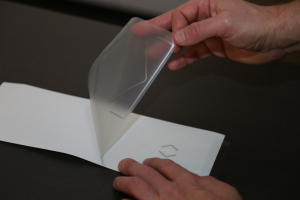
- Transfer the button contours.
Place the decal on the surface, ensuring that it is flat, level and the correct orientation.
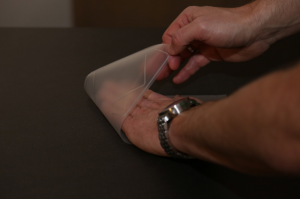
- Fixed blade coating the key contours.
Similar to step 2, remove any air bubbles by firmly pressing against them with a flat edge.
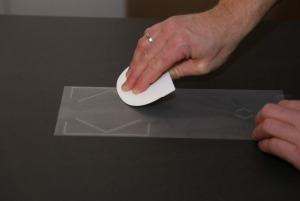
- Remove the transfer paper.
At a sharp angle, gently pull the transfer paper off of the decal. If you notice the decal coming off with it, please repeat step 6.
Optional: milling
Instead, of using the decal, the surface be milled or otherwise marked using a template that can be downloaded from this page
OPTIONAL: LED HOLES
| The five status LEDs can be individually turned on or off. Drill the holes directly above the LEDs ensuring that there is a straight path from the LED to the surface. | |
| Insert the five optical fiber tubes directly to the Loxone Surface and insert it into the holes one. | 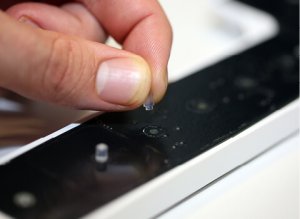 |
| To ensure that the holes are waterproof and durable, we recommend that you seal the holes from the top professional. For example, with Epoxy.. | 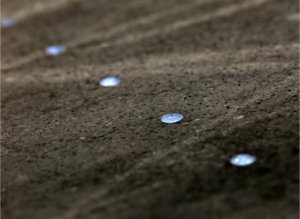 |
COMMISSIONING
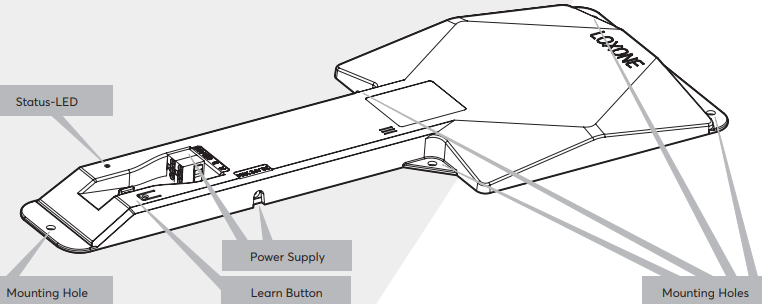
In delivery state, paring mode will be active after the power supply has been established. This is indicated by the status LED flashing red/green/orange.
Then follow the pairing procedure
To activate the pairing mode manually, hold down the pairing button for at least 5 seconds after establishing power supply.

CONFIGURATION
Once you have learned in the Touch Surface Air (information on how to do so can be found on the setup Loxone Air page) the device will be identified via the flashing of the 5 white LEDs on the Surface. You will also get 2 objects to use under the Touch Surface in the periphery.
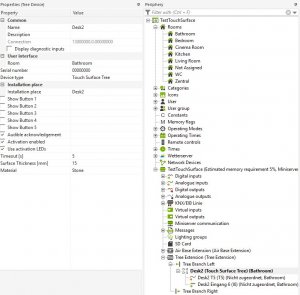
Via the checkbox “Diagnostic inputs activated”, the Touch Air can also be used for the online status.
In the properties, the keys 1-5 can also be displayed.
The “Activation enabled” checkbox allows you to change the mode (activation on or off).
If the checkbox is activated in the “Audible Acknowledgement” checkbox, a brief audible signal will sound at every click.
The activation LED can also be switched on / off and the material thickness, the material on which the touch surface is mounted, can be adjusted. Do note that the maximum thickness is 30mm.
CALIBRATION
The calibration process for the Touch Surface Air is relatively simple. First set the touch to the desired sensitivity using the value “Material thickness”. Only when this can not be achieved for certain keys should one use the fine adjustment. During calibration, the pressed buttons are not processed by the Miniserver.
CALIBRATION PROCEDURE
- Open the calibration window by pressing the calibration button in the properties tab.
- Adjust the material thickness
- The material thickness directly affects the sensitivity of the touch. The thicker the material, the more sensitive the touch becomes. This value is a reference point and does not necessarily have to be the same as the thickness of the material.
- Adjust the material
- If you are using a material that does not appear in the list, select Stone.
- Fine adjustment of the individual keys
- This can be set using the arrow keys in the calibration UI. Only when the thickness of the material is not satisfactory can one begin with the fine adjustment of the keys. The values range from -5 to 5; A negative value makes the button more insensitive, a positive makes the button more sensitive. This is done in the UI seen below:
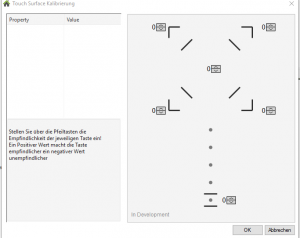
It is important to calibrate a Touch Surface after it has been applied to the surface it will be used on. In order to calibrate the device, it must be learned in and saved to the Miniserver. If this hasn’t been done, when you go to calibrate the device and it is not learned in, you will be greeted with the error message:

If it has been learned in and saved into the Miniserver, then the UI will appear and you will be able to adjust the calibration levels for each of the buttons on their own.
When changes are made in the calibration UI, the changes are immediately sent to the Touch Surface, no save-in Miniserver is required.
![]()
![]()
![]()
![]()
The activation button (input I6) can be assigned its own function.
Example: Press the activation button on the touch surface in order to wake him up. Another click on the activation button is in the kitchen, for example, the hood Activate.
ACTIVATION REQUIRED:
When enabled, the activation key must be pressed before the operation via five touch points can be carried out first. The operation of the five buttons is possible depending on the set activation time.
The activation time can also be set in the properties of 1-20 s.
AUDIBLE CONFIRMATION:
The touch surface responds with an audible confirmation when a key is operated. Audible feedback can be activated or deactivated in the properties.
LONG CLICK:
To use and long-term clicks, “timed receiving” the value 0 must (do not use) or a correspondingly large output can be adjusted (higher than maximum click duration) in the properties of the device at.
This value can be set separately in the properties for each digital input of the device.
COMBINED T5:
Are represented by the input “Combined keys T5” every five digital inputs on the touch surface Air. This input is used to speed up programming important building blocks for the Loxone standard.
The following functions are supported:
- Automatic blind: Inputs Cu (touch point 1) and Cd (touch point 4)
- Light control: input + (touch point 3)
- Music Server Zone: inputs V + (touch point 2) and V- (touch point 5)
- Central: function of each key is executed
To use this feature, you link the input “Combined keys T5” of the respective Touch Surface Air to the required block.
DOWNLOADS
100285 Touch Surface Air
Product Datasheet Product insert Declaration of conformity Milling template Declaration of conformity CZ