Why?
Whether it’s opening them to enjoy the fresh air and help to cool down a room on hot days, or ensuring they’re closed when it starts to rain, automating your Velux roof windows through Loxone can bring a range of benefits no matter what the British weather decides to throw at you. They can also be included in your security system, ensuring that windows are never left open when the property is unoccupied or during the night.
Hardware:
- Loxone Miniserver (any version)
- Loxone hardware with relays – you need 2x relays per device/device group you wish to control. These are available on a number of pieces of hardware, such as:
- Miniserver (excluding Miniserver Go)
- Relay Extension
- Multi Extension Air
- Nano 2 Relay Tree
- Nano IO Air (powered by 24v)
- Velux KLF 050 (for a single device/group) or Velux KLF 200 (for control of up to five devices/groups)
- Velux windows and other Velux hardware as appropriate
How:
This guide will assume you are comfortable with the installation, commissioning, and configuration of the Miniserver and any other applicable Loxone hardware.
It will also assume you have already fully paired and configured the Velux devices to work with the Velux KLF 050/200. Please refer to the manuals below for instructions on how to do this:
Hardware Setup:
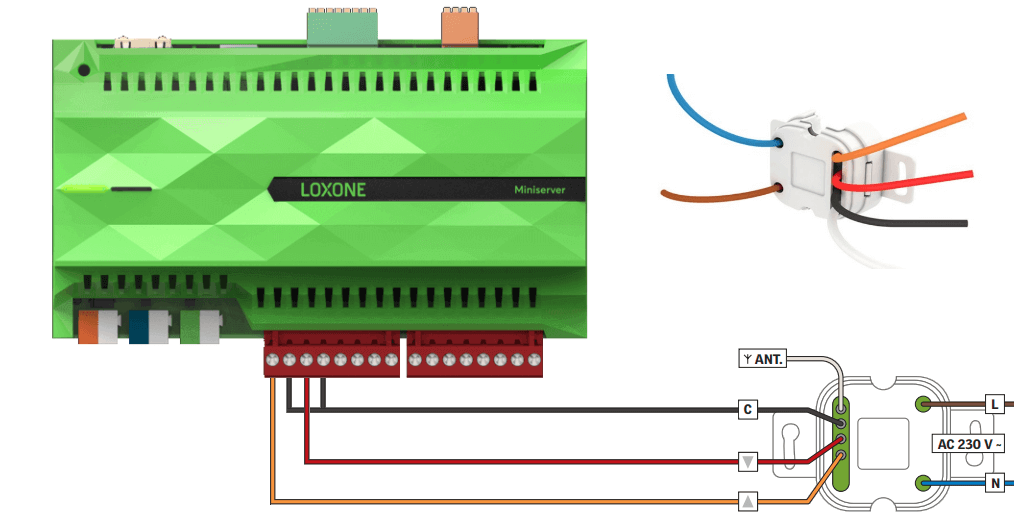
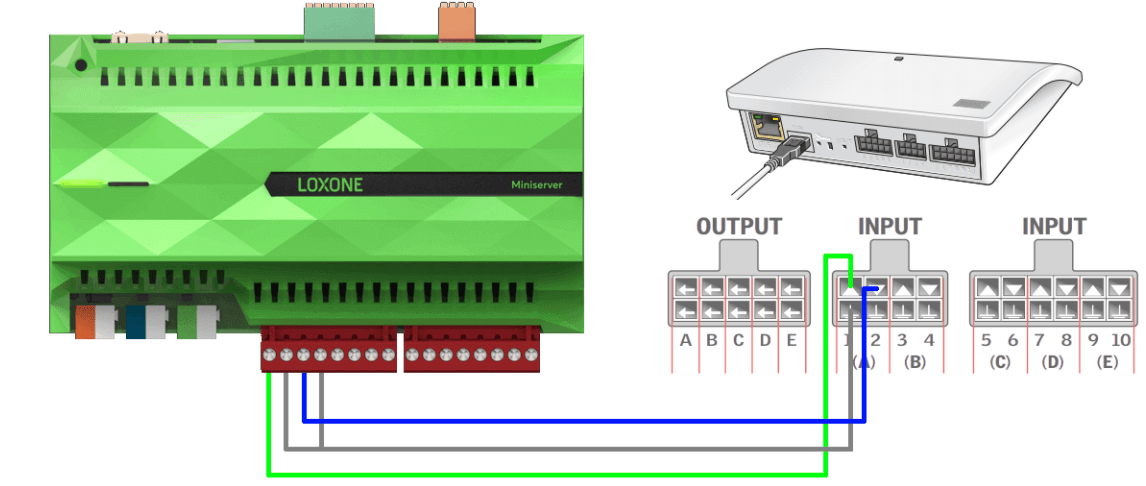
Connect the common wire(s) to one contact of both relays, and then the “up” wire to the other contact of relay 1, and the “down” wire to the other contact of relay 2. An example of how to do this with a Miniserver is shown below:
Velux KLF 050
Velux KLF 200
Important: For the Velux KLF 200, the 5 input channels (labelled A to E) are related to the 5 devices/groups which have been programmed into the device. The image above shows the correct wiring for input A. Repeat this for the other inputs with additional relays as required.
Software Setup:
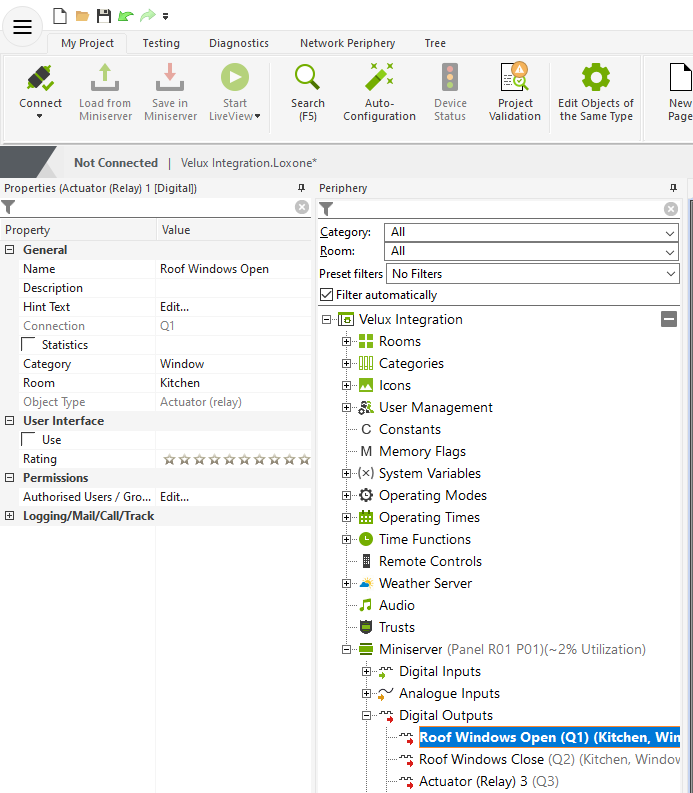
In Config, rename the relay outputs, and assign them an appropriate room and category:

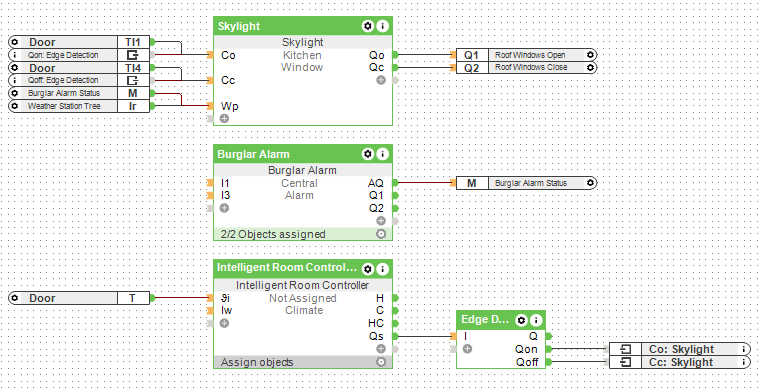
Create a “Skylight” block, name it and ensure it is in the appropriate room and category. Attach the “Open” relay output to “Qo”, and the “Close” relay output to “Qc”. You can also attach the relevant inputs to trigger the block if required – in this example we are using the top-left and bottom-left touch points on a Touch Pure:

Please be aware that, by default, the Skylight block outputs 5s long pulses on “Qo” and “Qc”. However, the Velux hardware requires an input pulse shorter than 1s in order to fully open or fully close the window. As such, ensure you adjust the “To” and “Tc” parameters accordingly:

Additional Functionality
As described earlier, integrating your Velux roof windows into Loxone can give a range of other benefits. In this example, we’re using the shading output of the Intelligent Room Controller – “Qs” – to trigger the roof windows to open if the temperature in the room rises above the shading setpoint, and to close when the temperature falls back down again. We’re also forcing the windows to close whenever it rains (as detected by a Weather Station Tree) or when the burglar alarm is armed. The “Wp” input on the Skylight block ensures that, once they are closed, nothing else other than manual interaction with the app can open them.


